Wind turbine blades inspection
Choosing the construction type
There is a button to open a dialog window for selecting the construction type in the construction binding mode:

Clicking on it opens a dialog window with the following options:
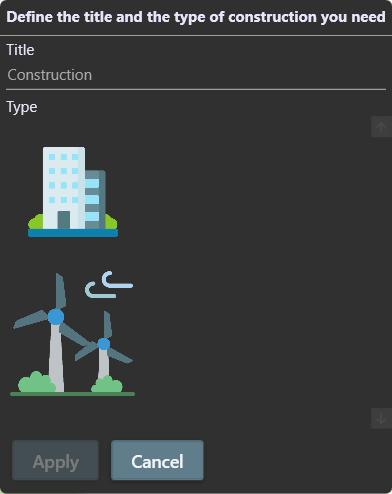
Select the type of building with the image of wind turbines, specify the name, and then click on the 'Apply' button.
Binding
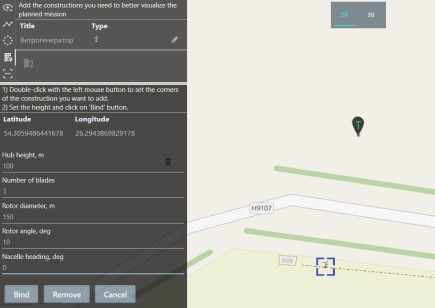
After adding the structure, you need to double-click on the location of the wind generator on the map. Next, specify the requested parameters of the wind generator and complete by clicking the 'Bind' button.
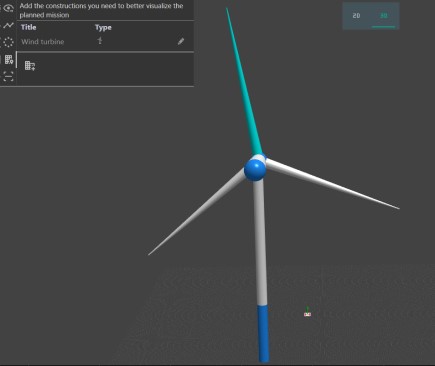
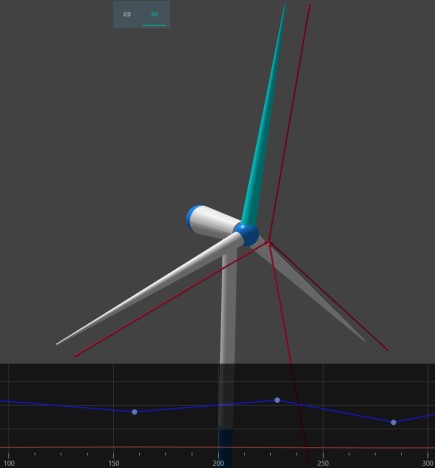
As a result, after switching to a 3D map, you will be able to see a 3D model of an automatically designed wind generator:
Adding a route
Go to inspection mode by clicking on  .
.
Select the previously added wind turbine from the list as an object. Then indicate the offset from the coordinates of the object on which the UAV should fly parallel to the wind turbine blades, without intersecting with them.
Next, specify the flight method and click on the create route button  .
.
The route is formed depending on the chosen flight method.
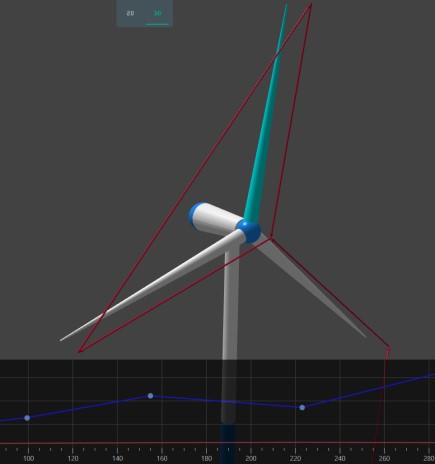
If you select the 'One way' method, the flight will begin from the end of the blade closest to the ground and will look like this:
If you select the 'Roundtrip' option, the route will be formed differently and will start from the center of the hub:
Camera settings
Find the point from which the object inspection begins. If the route is "one-way" and the lowest blade does not point straight down, then this will be a point to the right or left relative to the object coordinate. Otherwise, or if the route is "roundtrip", the starting point will be located opposite the center of the hub and hidden for editing. This happens since several automatically generated "return to center" points are plotted on top of it.
For simplicity, it is recommended to use an additional point that is as close as possible to the starting point of the flyby in latitude, longitude and altitude.
It must be added before creating the inspection route.
See the image below:
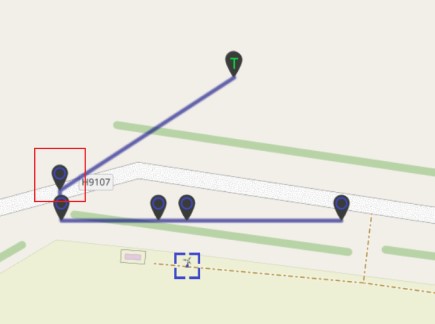
Right-click on it and select Edit.
In point editing mode, there are buttons for additional instructions for the camera  and the servo
  .
.
Rotate the camera to the desired angle using servo settings.
Then specify the shooting frequency using camera settings.
After that, do not forget to save the flight mission to the UAV and, just in case, to the hard drive. We also recommend to test each route in the simulation beforehand.
And start flying.
Notes
In order to edit a previously plotted point, right-click on it and select 'Edit', or 'Remove' to remove it from map.
If the home point has not been added, the program will require you to add it first.
We also draw your attention to the fact that the coordinates of the corners on the map are determined by the selected map supplier and inaccuracies are possible, therefore a calibration flight is strongly recommended.
Reminder
If you have forgotten the meaning of a button, simply hover your mouse over it and wait until a tooltip appears.